

Part 1: How to create a bootable USB for Windows 11

Download the Media Creation Tool
- Go to the official Microsoft website: Here
- Click “Download now” under “Create Windows 11 Installation Media
- Run the tool after downloading.

Accept the License Terms
- Read the license terms.
- Check i accept the license terms and click “ Accept “

Choose Language and Edition
- Select your preferred language, edition and architecture.
- Click “ Next “

Choose “USB Flash Drive”
- Select “ USB flash drive “.
- Click “ Next “

Select Your USB Drive
- Choose your USB drive from the list.
- Click “ Next “.

Download Windows 11 and Create USB
- The tool downloads Windows 11 and creates the bootable USB.
- This may take 20-60 minutes depending on your internet speed

Your Bootable USB is Ready!
- Click “ Finish “.
- Safely eject your USB drive.

Part 2: Advanced & Intermediate Methods

Create Bootable USB Using Rufus (Advanced)
- Download the BIOS file.
- Extract if necessary.
- copy the BIOS file to a USB drive (FAT32 formatted).
- Reboot and enter the BIOS
- Use the BIOS update utility (often in the “Tool” or “Advanced” menu).
- Select the BIOS file from the USB drive.
7. Start the update.


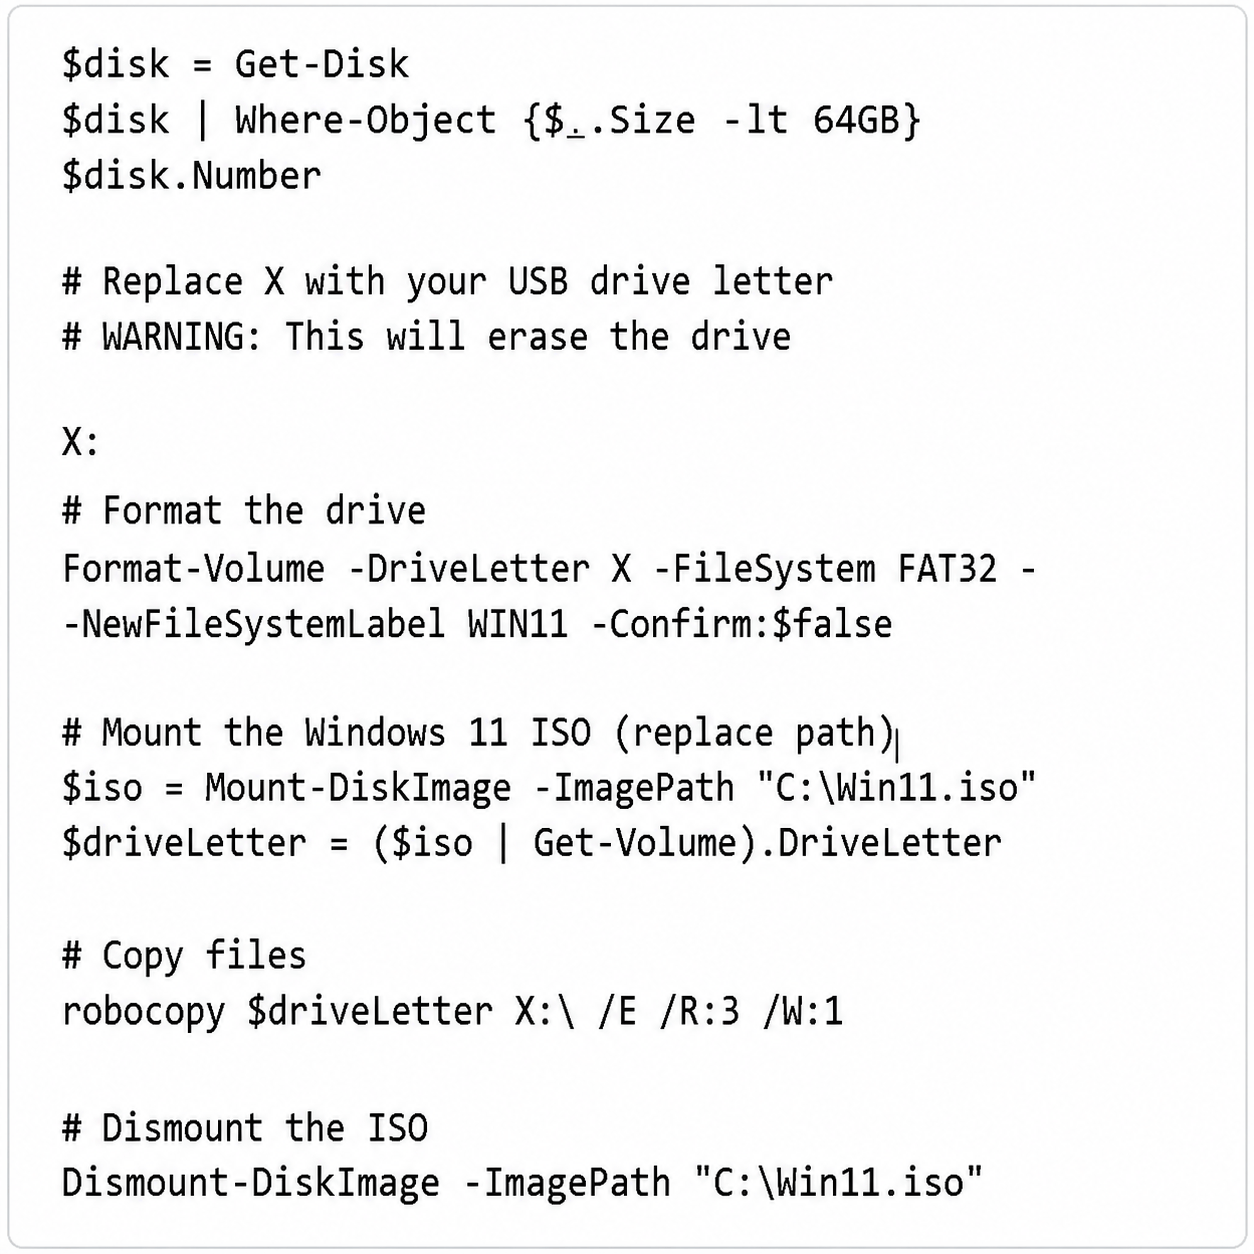
Create bootable USB Using Windows Powershell
- Insert your USB drive.
- Open PowerShell as Administrator.
- Run the following commands


Create Bootable USB Using Command Prompt
- Open Command Prompt as Administrator.
- Type diskpart and press “Enter”.
- Run the commands above.
- Mount the Windows 11 ISO
- Copy all files from the ISO to your USB.


Download Windows 11 ISO Directly (For ISO Method)
- Some motherboards allow BIOS backup to USB.
- Enter BIOS setup.
- Go to “Tool” or “Save & Exit”.
- Select “ASUS EZ Flash” / “MSI M-Flash” / “Gigabyte Q-Flash” or similar.
- Save current BIOS before updating.

